Showing posts with label tutorial. Show all posts

Monday, August 26, 2013

Back To School "Teacher Gift Tower"- Doodlebug Design

Since many of you are going back to school today- you'll love this tutorial I did for Doodlebug Design.
What teacher wouldn't want this as a back-to-school gift?


I personally love this project, and I don't even know how I came up with it,
but it's actually super easy to construct and requires NO ADHESIVE! (besides the card)


Hop over to the Doodlebug Blog post HERE to see the full step-by-step photo tutorial
and then go make one for your favorite teacher.  They'll appreciate it!


-Tiffany

Tuesday, May 28, 2013

Bella Blvd Fabric Style with Silhouette! Girl's Summer Outfit + Promo


Bella Blvd had a fun opportunity to team up with Silhouette, and I was able to play with the new
Fabric Blade and Heat Transfer Interfacing.
It was such a fun project, that I decided to create a full step-by-step tutorial to go along with it. 

You can find the FULL TUTORIAL which walks you through how to cut fabric with the Silhouette Cameo
 and create a NO SEW design for a shirt, go to the Bella Blvd Blog HERE!


I also decided to create a matching skirt and headband to make a complete outfit.


The headband features Crochet Flowers and Crochet Hearts by Bella Blvd.
They are great for fabric projects, too!


And the skirt and shirt feature Bella Blvd's Sunny Happy Skies and Puppy Park fabrics for Riley Blake Fabrics.


-Tiffany


Saturday, February 23, 2013

Bella Blvd Baby Quilt- Freezer Paper Applique Tutorial

My sister is having a baby in a few months, and it WAS a boy :)
Then... next appointment... oops!

Now it's a GIRL!

So... the boy quilt I made will have to wait for another baby, and I pulled out my adorable Sunny Happy Skies fabrics by Bella Blvd to make her a brand new (and WAY cuter) baby quilt.
I searched for a cute girly pattern and found one that I just loved!


Isn't this the cutest pattern?  It's "Daisy May" from Stitch Studios: Designs by Cyndi Walker.
The pattern can be found HERE.  I picked mine up at my local quilt shop.


This quilt uses the "Freezer paper and starch" applique method.
There's a good tutorial HERE if you want a detailed lesson.  It even has the same shape pieces.

It's a much easier method for applique that allows you to form your fabric shapes before you sew them.
This way you don't have to embroider them with a satin stitch (miles and miles of thread) or finish the edges by hand (pain in the neck).


The shapes don't have to be cut perfectly because you'll fold the edges around a "stencil template"
I cut mine several at a time.


Then you make a stencil with Reynold's Freezer Paper (not to be confused with parchment paper or wax paper- SO not the same thing.  If you want your iron to work for a long time, be sure to buy the right stuff)

See how the stencil is made HERE.

Spray starch is sprayed into a bowl, and when the foam dies down, it's "painted" on the edges of the fabric with a paint brush.


The edges of the fabric are then folded under and pulled tightly against the edges of the stencil.
Then they are ironed for a few seconds until they're completely dry.

Put a layer of freezer paper over your ironing board, too.  If you don't, your ironing board will look like burnt toast when you're done from all the cooked starch.  When you're done you just pull the freezer paper off and toss it.


The points of the petals are pulled sharp and pressed again.  Then the stencil is removed and the fabric retains it's shape.  You can re-use the stencil until it gets too soggy and loses it's form.
When that happens you just make a new one and keep chugging along.

I made 64 of these fabric petals.  It took 5 hours.  

FIVE.

That includes cutting and pressing.  I sat and watched movies a few nights in a row until they were done.
If you're gonna watch movies you might as well do something productive at the same time, right?  Ugh.


Once you get all the petals completed, the rest isn't too bad.
They are pinned on and appliqued.


The centers of the flowers were made using a Clover brand "Yo Yo Maker"- size small.
You can find these at your local quilting or fabric shop.
Yo-yo's can be made by hand, too, but this way you don't have to stress so much.
They're nearly perfect each time, and they're uniform.  The little tool is pretty cool.

The yo-yo's took about an hour.

And I watched more TV.....


I sewed the yo-yo's onto the quilt with my machine instead of by hand because it's way easier
and because I don't want a baby ripping them off and putting them in her mouth.


I love that the border uses jumbo rick-rack.  It think it's darling.

I bound the quilt with rose-style (swirly) Minky in hot pink.
Minky is the most plush snuggly awesome fabric on the planet.
I want an adult size Minky blanket I can snuggle up in.


Thank you to my mom who just happened to stop by at the perfect time to be my quilt holder for this photo.

Maybe I'll make myself a giant Minky quilt so that I can wrap up in it and watch TV the next time I have to applique for hours.... and hours...... and hours........ :)

Anyway... I think my sister is going to love it.
And luckily I don't think she reads my blog-
So it'll be a surprise!

-Tiffany

Saturday, December 29, 2012

Bella Blvd Fabric Style- Doggy Christmas Gift Set with a Tutorial!

This month I had a lot of fun coming up with fabric ideas for Bella Blvd.
I'm absolutely loving this opportunity to sew every month.  I love paper crafting, but I love sewing, too, and it's such a fun way to create great things for the ones you love.

Our family was fortunate enough to adopt a dog a couple of months ago and he's been such a great addition to our family.  He's a sweetheart and he gets along with the kids so well.  He's a snuggler, and he likes to be wherever I am in the house all day long- including my craft room.  So I thought I'd make him a cute dog bed as well as some other fun Christmas gifts to help make him more a part of our family.

My friend thought I should make him a stocking- since I made all of the rest of us one.
I agreed :)
You can see some of our family's stockings in the Cricut Holidays Idea Book
(they're off my blog for a few more weeks since they were published)


The felt dog on the front of the stocking is actually one of the puppies on the fabric that I enlarged and cut from felt with fabric scissors.
Then I appliqued him onto the stocking in layers.


The bone is also enlarged from the fabric, traced, and cut out.  I embroidered his name onto the white fabric with an embroidery machine, and then I appliqued it onto the brown fabric using a satin stitch on my sewing machine.  


See?  Now his matches ours.  (I think his is cuter than ours actually) :)


I also made him a dog bed that matches my aqua craft room.
This fabric is not only adorable but it was the perfect color!
He loves it.  He's actually sleeping in it as I type :)


And then I whipped out a quick leash.  MUCH cuter than any leash from the store, would you agree?


Here's a few photos of the creative process behind the stocking.
I had a lot of fun with this one, so I wanted to document it.


You can use plain old Elmer's glue to attach fabric pieces before they're sewn on.
As long as the glue is dry you won't hurt your sewing machine.  I've even used Elmer's glue to piece quilts if I don't want to sew them.  Then you quilt them afterward.

Who knew, right? 


Basically I just cut the fabric 1/2 inch larger than our stockings to allow for a seam allowance.
I didn't have a pattern- I made it up as I went.
I didn't have a pattern for our stockings, either.  I just traced a stocking from the dollar store when I made those ones.


Once the glue was dry, I pinned the dog to the stocking front and sewed around each layer with a different color of thread.


Here's a look at the embroidery process.  I love this machine.  Too bad I don't own one.
I have to borrow my mom's.


How fun is that??

Thanks for stopping by!  Can't wait to show you what I'm working on for next month!

-Tiffany

Wednesday, October 24, 2012

Imaginisce "Tri Shutter" Birthday Card

Yesterday on the Imaginisce Blog I shared a card I made using the Clicut
retractable craft knife.  


These cards are called "Tri Shutter" cards, and I've seen them around and always wanted to make one- 
so I finally did.


I have a short paragraph about how it's made on the Imaginisce Blog.
You can see it HERE.


Tiffany

Tuesday, October 23, 2012

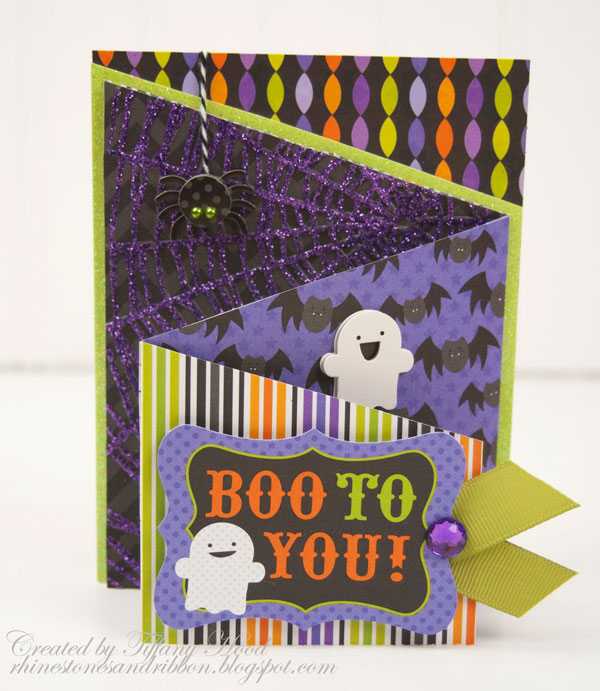
Doodlebug Tri-Fold Glitter Card and a Tutorial!

I have a tutorial on the Doodlebug Blog today for this card!

Cute, huh!!
I LOVE LOVE LOVE Halloween!  I love the colors, and I LOVE Doodlebug's new Haunted Manor collection.  This week on the Doodlebug Blog it's "Bling That Thing" week, so made a "blinged out" card.


The spiderweb wasn't on the paper- I created it using Doodlebug's new Metallic Sugar Coating glitter.
This glitter has the best texture, and the shine is brilliant!  It's my favorite of their glitters.


They also have new larger Jewels.


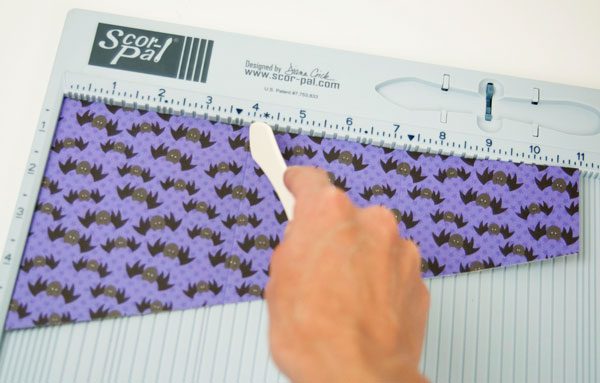
The full tutorial will show you how I did the spiderweb......


And also how to make the card base.

See it on the Doodlebug Blog HERE.


Thanks for visiting!
-Tiffany

Wednesday, September 19, 2012

Pebbles "How To Tuesday" Gift Card Holders

Yesterday on the Pebbles Blog these two cards were featured for
"How To Tuesday"


I love making tutorials and teaching techniques, and I've created a full step-by-step
photo tutorial on how to make these cute gift card holders that you can see HERE.


I used the Sunnyside and Hip, Hip, Hooray collections for these cards, as well as cardstock from American Crafts, ribbon by Stampin' Up!, and the Sunnyside stamp set.


Thanks for visiting!  And be sure to check out the full tutorial.

-Tiffany
Related Posts Plugin for WordPress, Blogger...